
This week, I had the privilege of taking a new Twitter tool for a spin. Nestivity (currently in beta) takes your Twitter engagement to a whole new level by encouraging people to engage in conversations and making those conversations easy to follow by placing them in a threaded discussion form.


Benefits for Bloggers
While the tool was developed with brands and businesses in mind, there are lots of benefits for bloggers as well.
1. Engage more with your followers. We all know that frequent engagement with your followers strengthens your relationship with them. Use this tool to really start talking to your Twitter community vs. broadcasting at them.
2. Connect with influencers. Anyone with a significant amount of followers is hard to chat with on Twitter because your tweet is getting lost in a sea of mentions and retweets. Nestivity lets you have discussions with popular Twitter users in an uncluttered environment where they are more likely to notice you.
3. Promote your blog posts with discussions on Twitter. Invite people to come and talk about your latest blog posts on Twitter. This should lead to more retweets of your content.
4. Build your Twitter following. As followers of those who are participating in your discussion start chiming in, you’ll have the chance to meet new people and grow your Twitter following.
5. Increase your Klout. Not that anyone cares about Klout scores (wink wink), but participating in regular discussions on Twitter will help boost your Klout rankings due to the increase in mentions of your @username in discussions.
How to Participate in a Nestivity Community
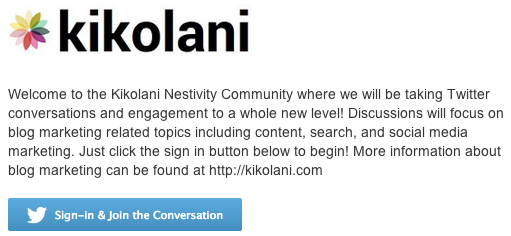
Participation in a Nestivity community is easy. First, you will need to sign in to the community using the sign in button on the main page.

Alternatively, if you go directly to a discussion page and try to reply to a discussion, it will prompt you to sign in there.
There are two ways to participate. First, you can use the three prompts to share experiences, post ideas, and ask questions.


Here are some ways to use these prompts to engage with brands, businesses, and bloggers.
- Share an Experience – On brand or business communities, you can use this to share your experiences with their product or service. On communities by bloggers, you could use this to talk about your user experience on their blog or website.
- Post an Idea – On brand or business communities, you can post feedback about things you would like to see them offer as products or services. On communities by bloggers, you could post ideas about what they should write about.
- Ask a Question – Pretty self explanatory. Anything goes.
These tweets will show up in your Twitter stream and in the Community Recent Tweets stream.


Next, you can participate in discussions. Active discussions are listed on the main community page.


Simply click on a discussion and use the Leave a Reply box to add your thoughts.


It’s important to leave the link intact. It doesn’t count towards the number of characters in your response / tweet as it will be shortened when it is posted. You can change the Twitter handle to reply to other participants in the discussion or remove it altogether to have more characters. These tweets will also be posted to your Twitter stream.
Finding Nestivity Discussions to Participate In
If you want to keep track of new Nestivity discussions by anyone, simply perform a Twitter search for the nestivity.com/discussions/. You can search this on Twitter and save it or add it as a column in your HootSuite or other Twitter management tool.
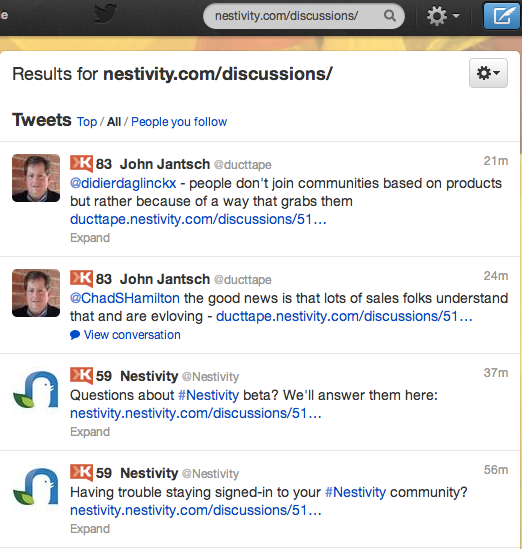

This way, you can find the latest Nestivity users and their discussions. On Twitter, you can filter this view all tweets, tweets from just people you follow, or the top results on Twitter.
People on Nestivity
Here are some of the people using Nestivity now!
- Kikolani – A community to discuss all things blog marketing related including content, search, and social media marketing.
- Robert Scoble – Rackspace’s Startup Liaison Officer, who grew up in Silicon Valley, brings you technology news, videos, and opinions. Currently has lots of discussions on SXSW.
- Mari Smith – Facebook marketing expert and social media superstar!
- Guy Kawasaki – Author, entrepreneur and former chief evangelist of Apple.
- Duct Tape Marketing – Small business marketing consultant, speaker and author of Duct Tape Marketing, The Referral Engine and The Commitment Engine.
- Jure Klepic – Social Media Innovator & Strategist who is willing to say what others leave unspoken.
- Bryan Kramer – President/CEO of PureMatter in Silicon Valley, consultant, blogger, speaker, and marketing strategist.
- Ric Dragon – Author of Social Marketology, speaker, artist, drummer, and marketing blogger.
- Chris Voss – Social Media Consultant, Trainer, Speaker, The Chris Voss Show, CEO of Strategix One. Top SM Leader seen by Forbes, CNN, Huff Po, Alltop News & other media etc.
- InfusionSoft – All-in-one sales and marketing software for small businesses.
- Lauren Dugan – Social media consultant serving SMBs, founding AllTwitter editor. Online social media instructor.
- Binnys Beverage Depot – Offers online ordering with local pickup of fine wine, spirits, beer and beverages, cigars, and gourmet gifts.
- Stealthmode – Co-founder, Stealthmode Partners, helping entrepreneurs succeed.
- Charlie Tour – PGA Tour + Content Marketing @TaylorMadeGolf. Native Iowan (Hawkeye).
- Focus Family – Global ministry helping families thrive.
- Hensel – Online brand strategist and twitter conference reporter.
Some communities aren’t active just yet as they were only set up this past week, but they should be active soon!
How to Setup Your Nestivity Community
Nestivity is currently in beta with limited participants until the official launch in April. You can reserve your account now to be notified when it is ready to go.
Once you gain access, setting up your nest is easy. You simply name your community, then add a logo (necessary) and background image (optional).


Then you edit your link color and add a message for both members of your community and first time visitors.


That’s it! Then your community will look like this.


Browsing the Community Dashboard
You will then have access to a Community Activity dashboard that shows you all of your Twitter mentions and mentions specifically sent through Nestivity organized by experiences, ideas, questions, and active discussions.


Creating a Discussion
To create a discussion, simply select a tweet in your Community Activity dashboard and use the Turn into a Discussion link.


Then you will configure your discussion settings.


First, you will add your discussion to a new or existing projects. Projects are simply ways to categorize the your discussions. Then add your discussion title, description, and image. Remember that discussions are meant to encourage just that – discussions. So think of a good question to ask to get the conversation rolling. You will then click Preview.


Before you publish, make sure to change the standard “Join My Discussion” message to something custom. This is the tweet that will be sent to your account to announce your latest discussion.
Join the discussion on your favorite #SEO tools! kikolani.nestivity.com/discussions/51…
— Kristi Hines (@kikolani) March 16, 2013
You can then monitor replies on your discussion page. Be sure to use the Leave a Reply box to reply so that tweets stay in the same discussion.
I chose the above example to highlight how you could use Nestivity to promote your blog posts. But you can create discussions from any of your own tweets or tweets that include your @username from others. This means you can do things like:
- Highlight when others tweet your post.
- Turn questions people ask you into community discussions.
- Turn feedback people send you into community discussions.
The key is to turn tweets that could lead to engaging conversations into discussions.
Pricing
Nestivity is a freemium tool. You can create your own Nestivity community for free, or you can select pricing plans starting at $19 per month if you need moderators or want your tweet data stored in Nestivity for longer than 60 dys.
Where You Can Leave Feedback
Nestivity has their own community where you can use the Post an Idea and Ask a Question tabs to share your thoughts and feedback. I’ve already added some comments including:
- Letting owners add a link to their blog / website.
- Adding the official Twitter follow button so people can follow community owners quickly.
- Having replies to tweets in discussions automatically populate the discussion URL which keeps replies organized.
- Logging in once to participate in a community. If you close a the window the community is in, you have to log in again.
Your Thoughts
What are your thoughts about using Nestivity? Give it a try by participating in these discussions on guest blogging, Google Reader alternatives, SEO tools, and the embedded one below!
